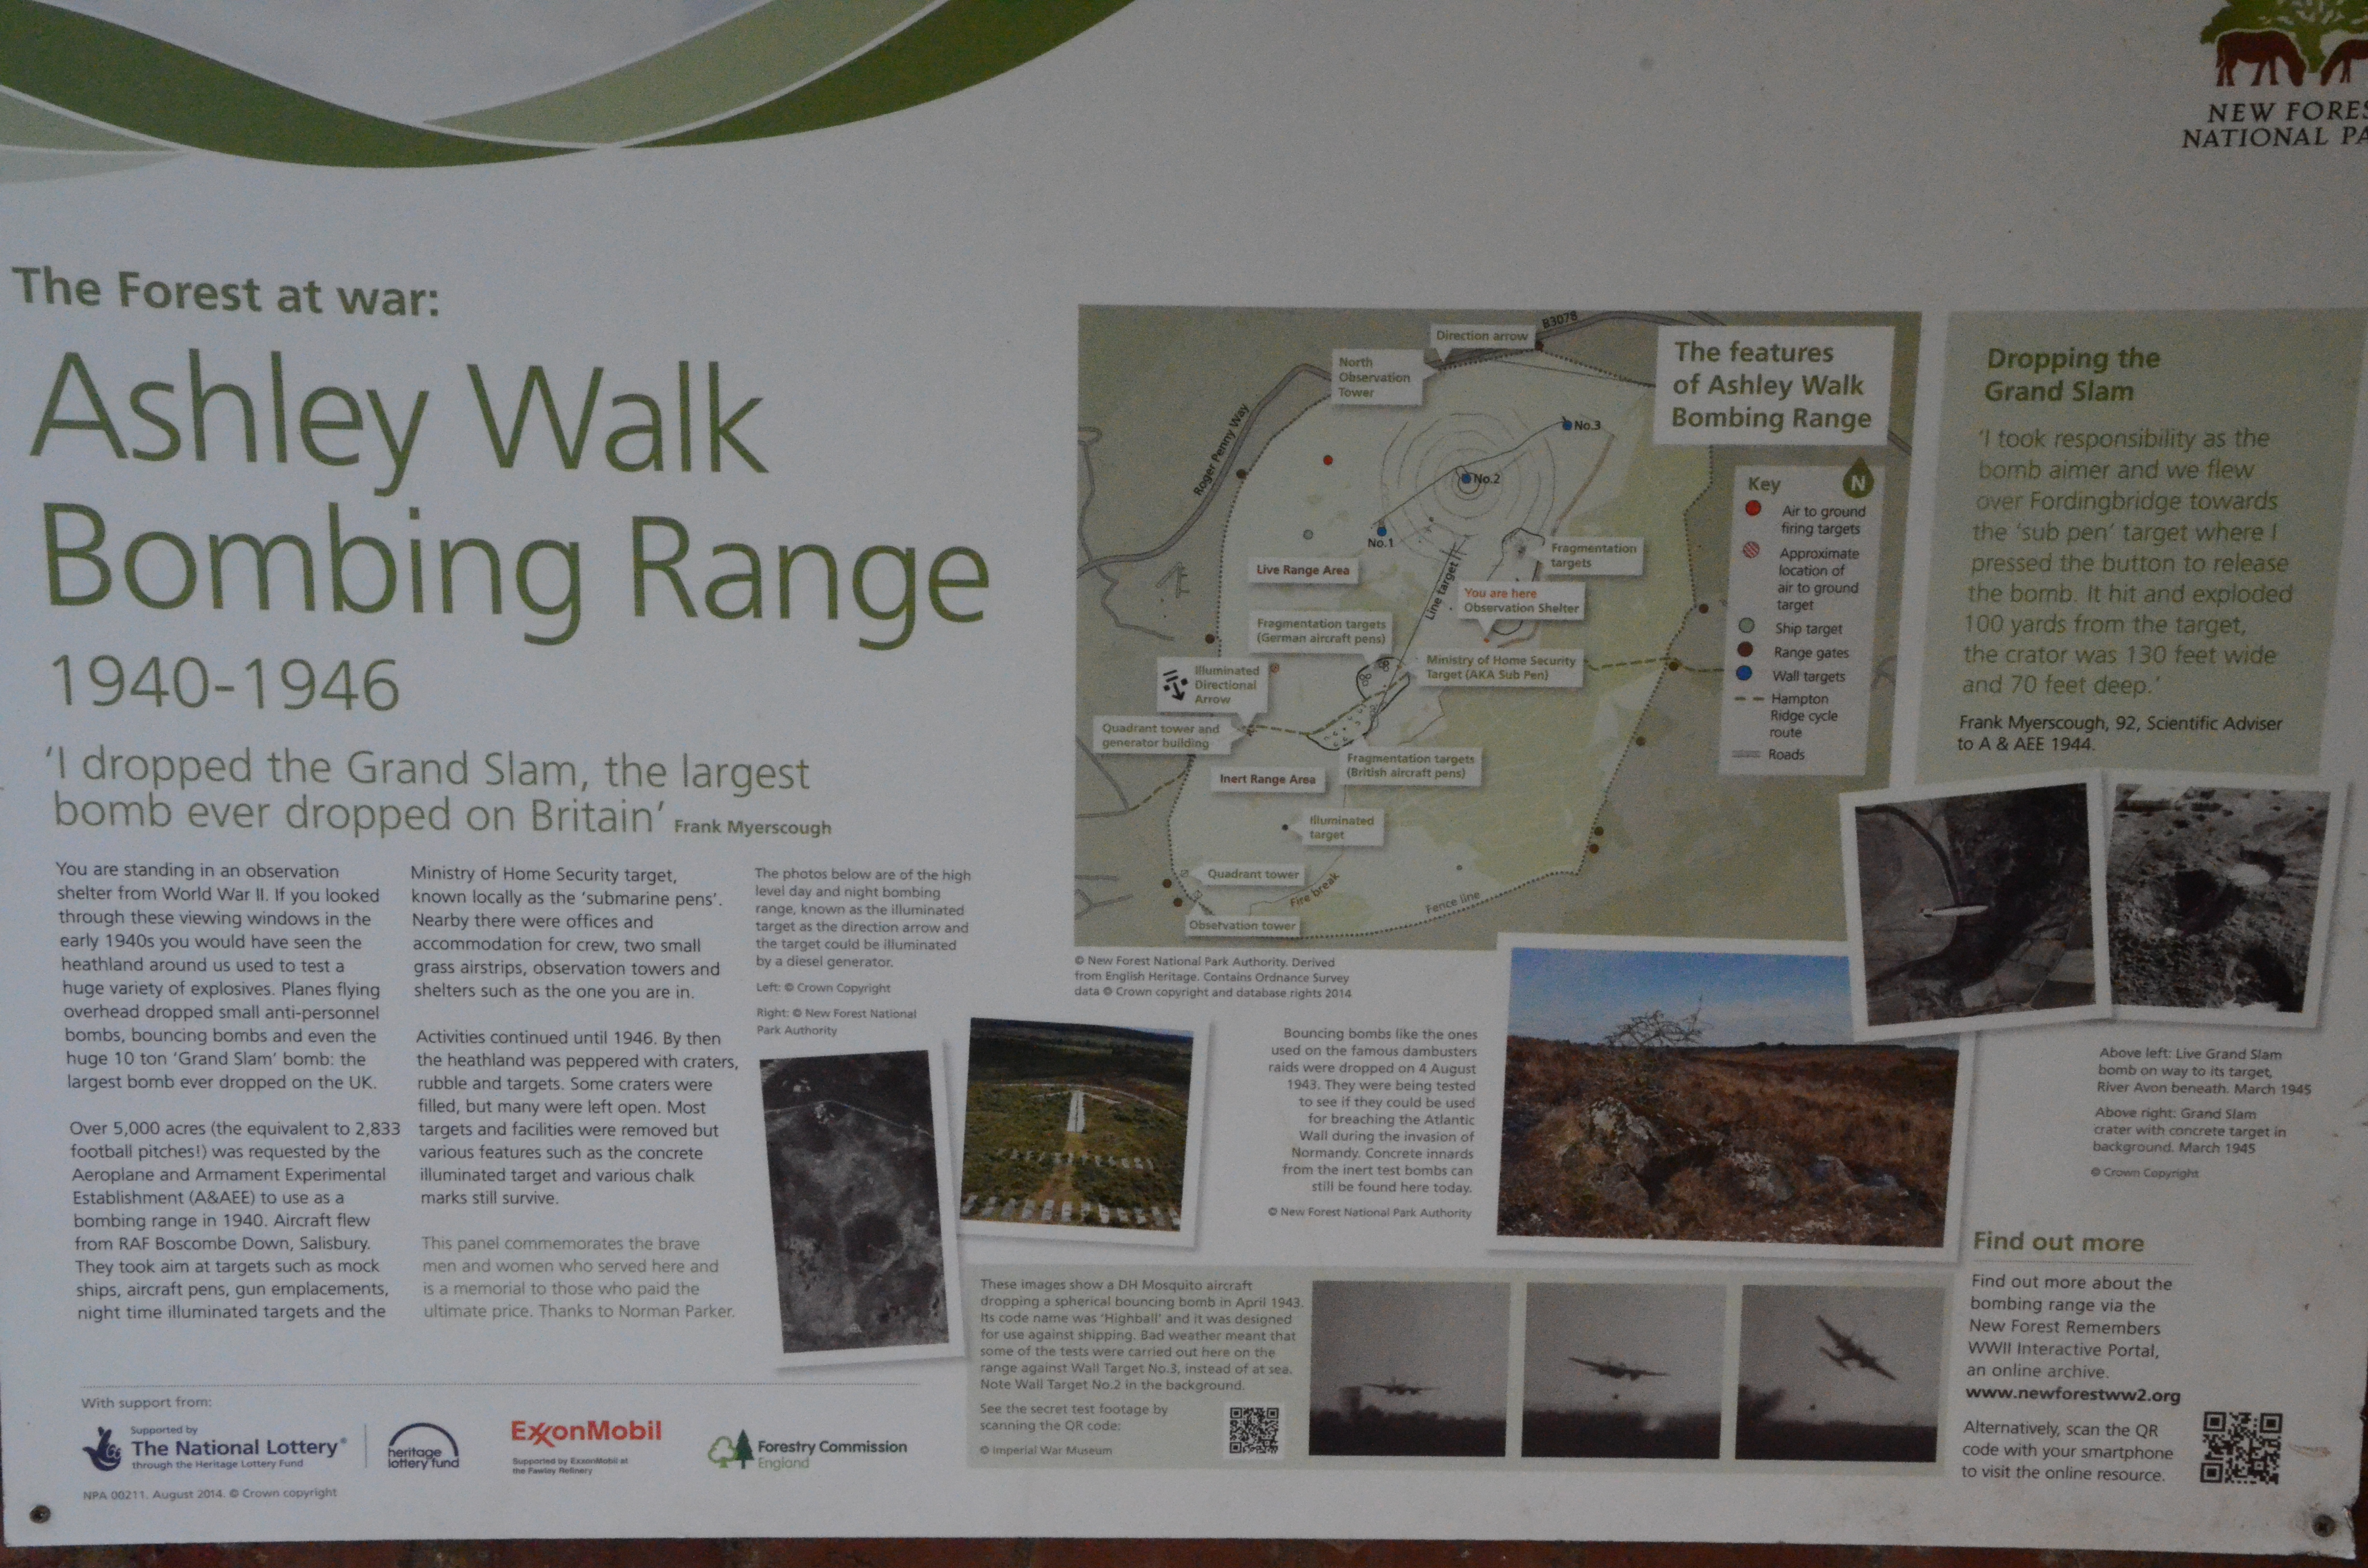
New Forest Wartime Remains
 During both World Wars the New Forest was used for military purposes. Remains of some of this still exist in 2017.
I spent some time trying to find them, using a number of websites that gave descriptions of locations, sketch maps etc.
None were particularly exact, so here I will give grid references to aid others in locating them.
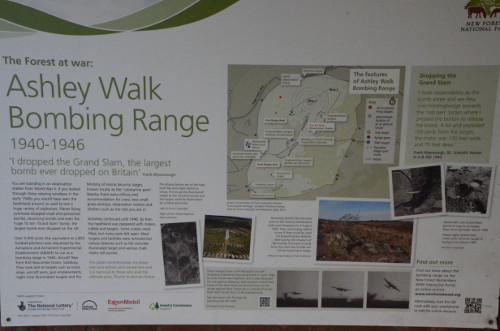
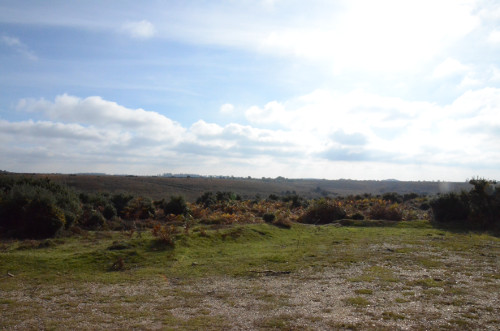
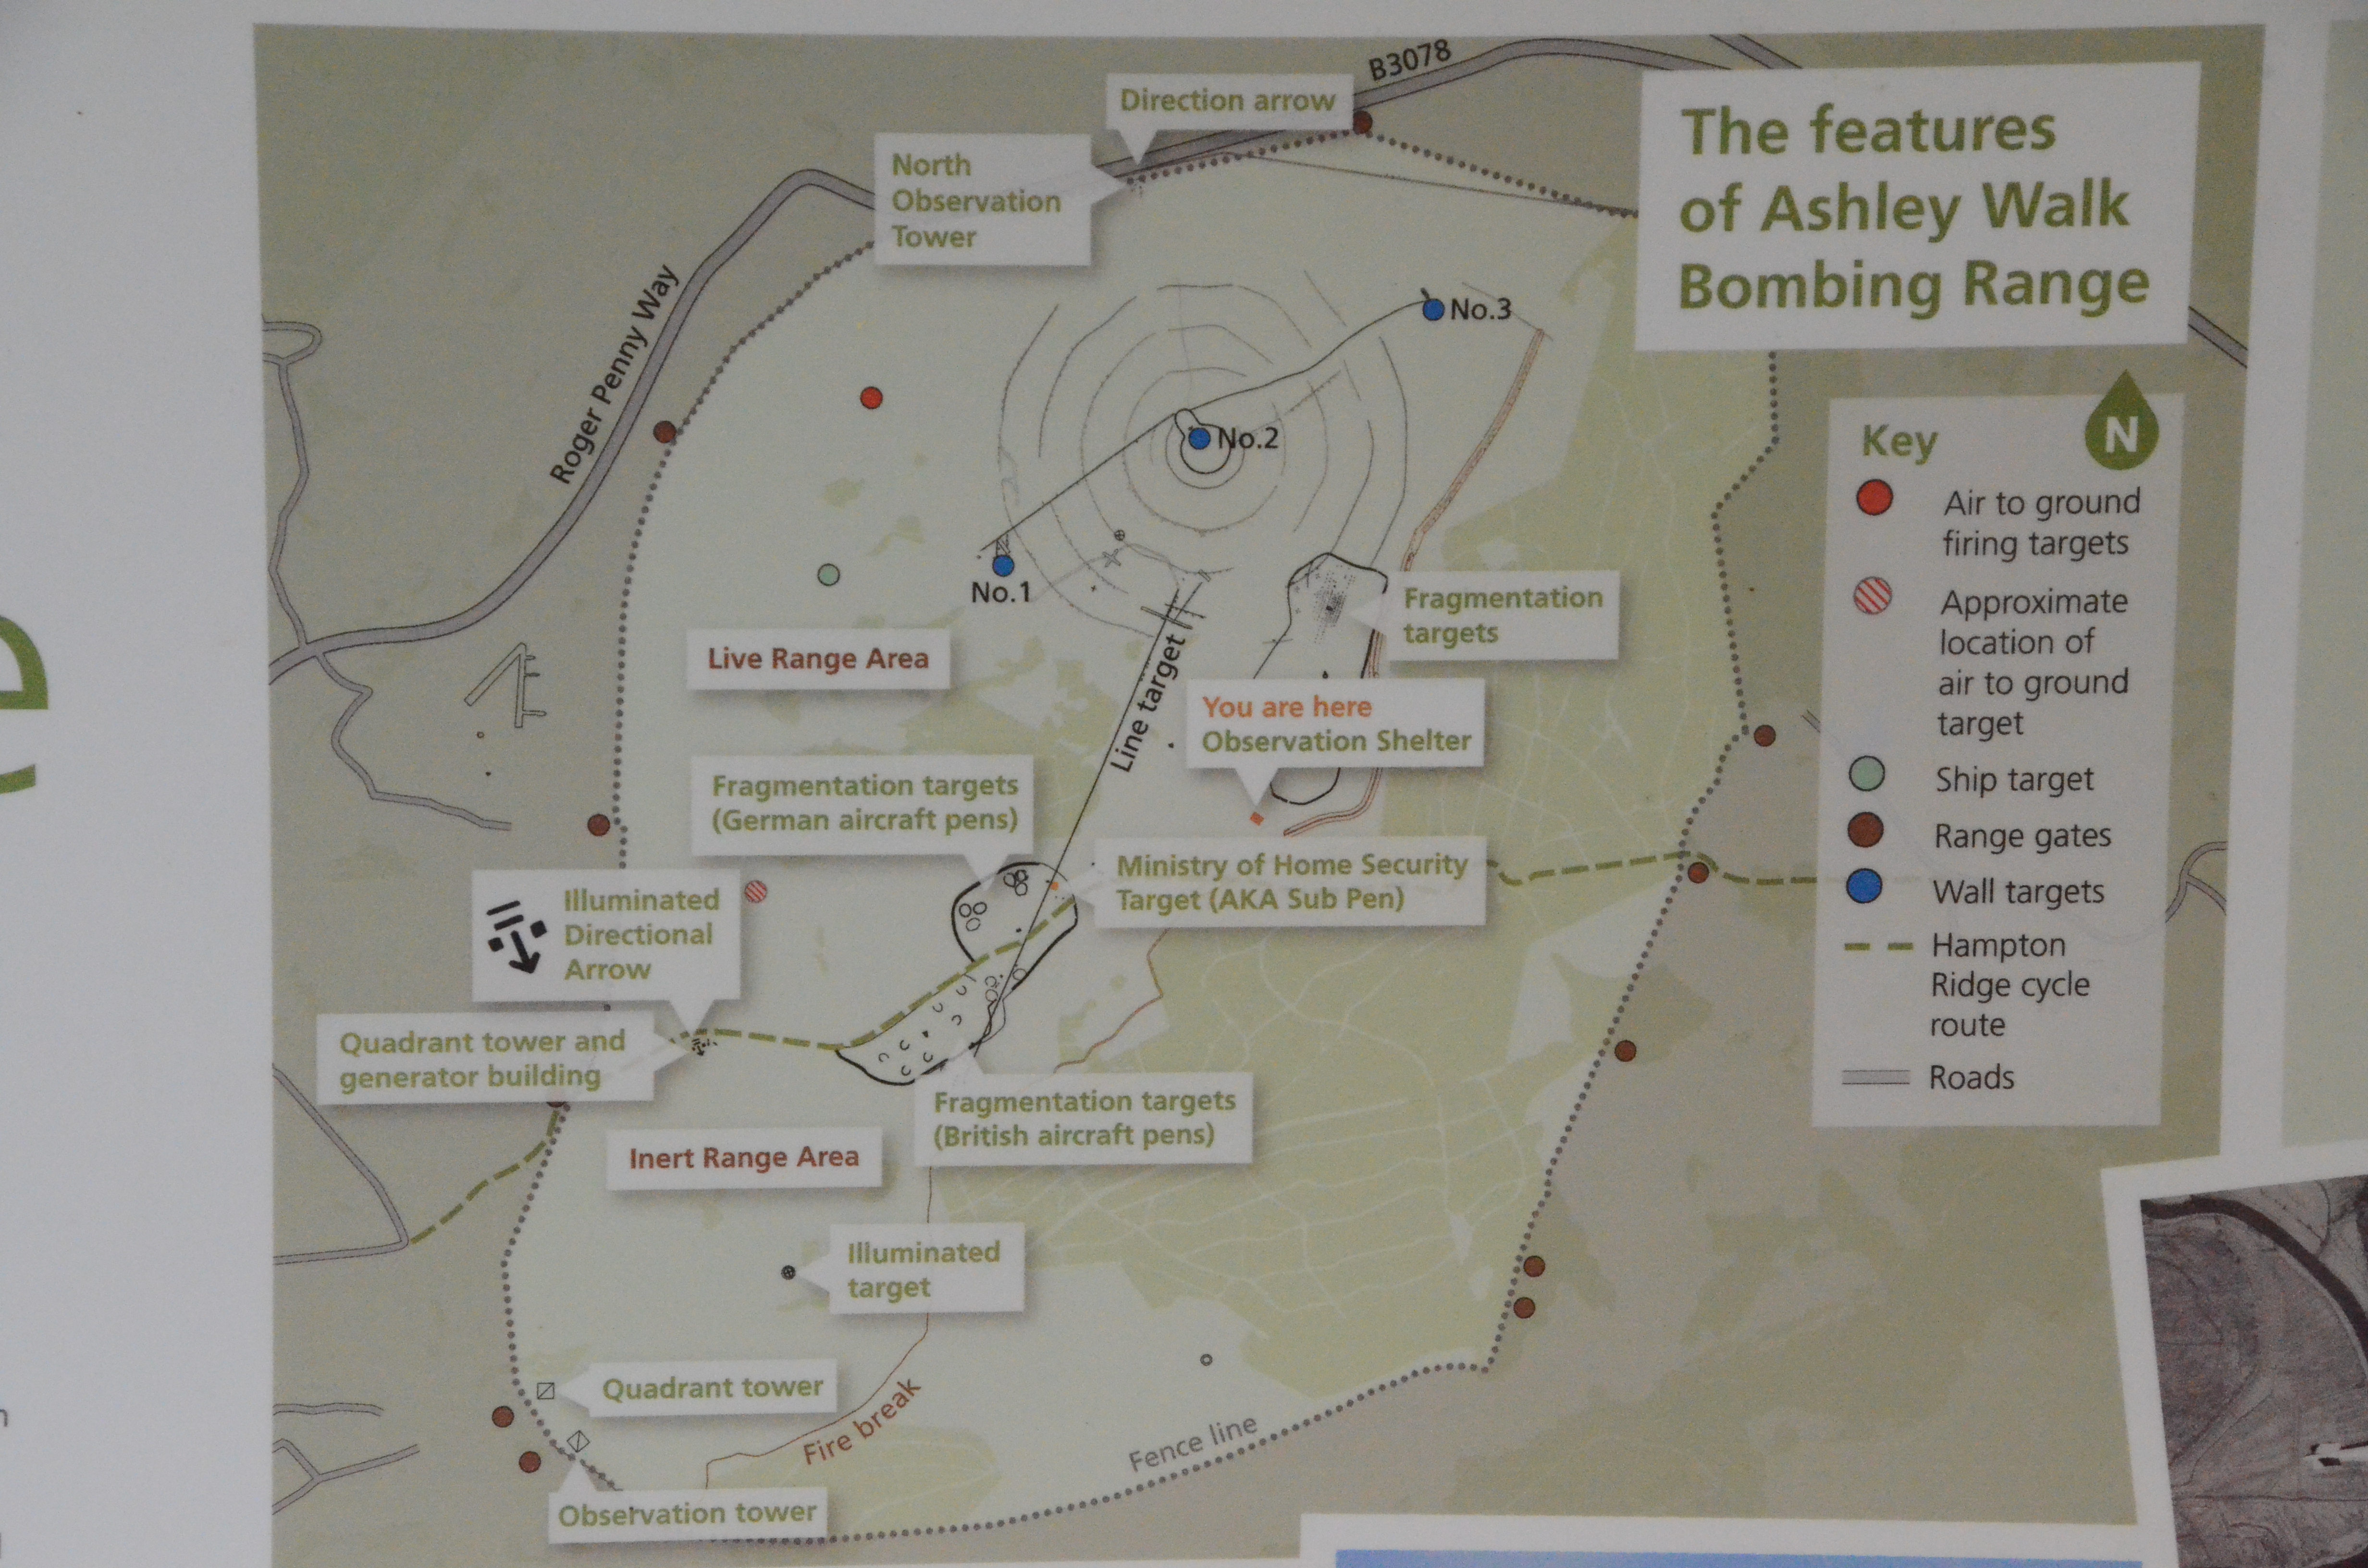
Ashley Walk bombing range
A useful collection of wartime pictures can be found here:
An interactive map can be found here
The area was initially intended for testing munitions against a variety of targets, and later was used to train bomber crews.
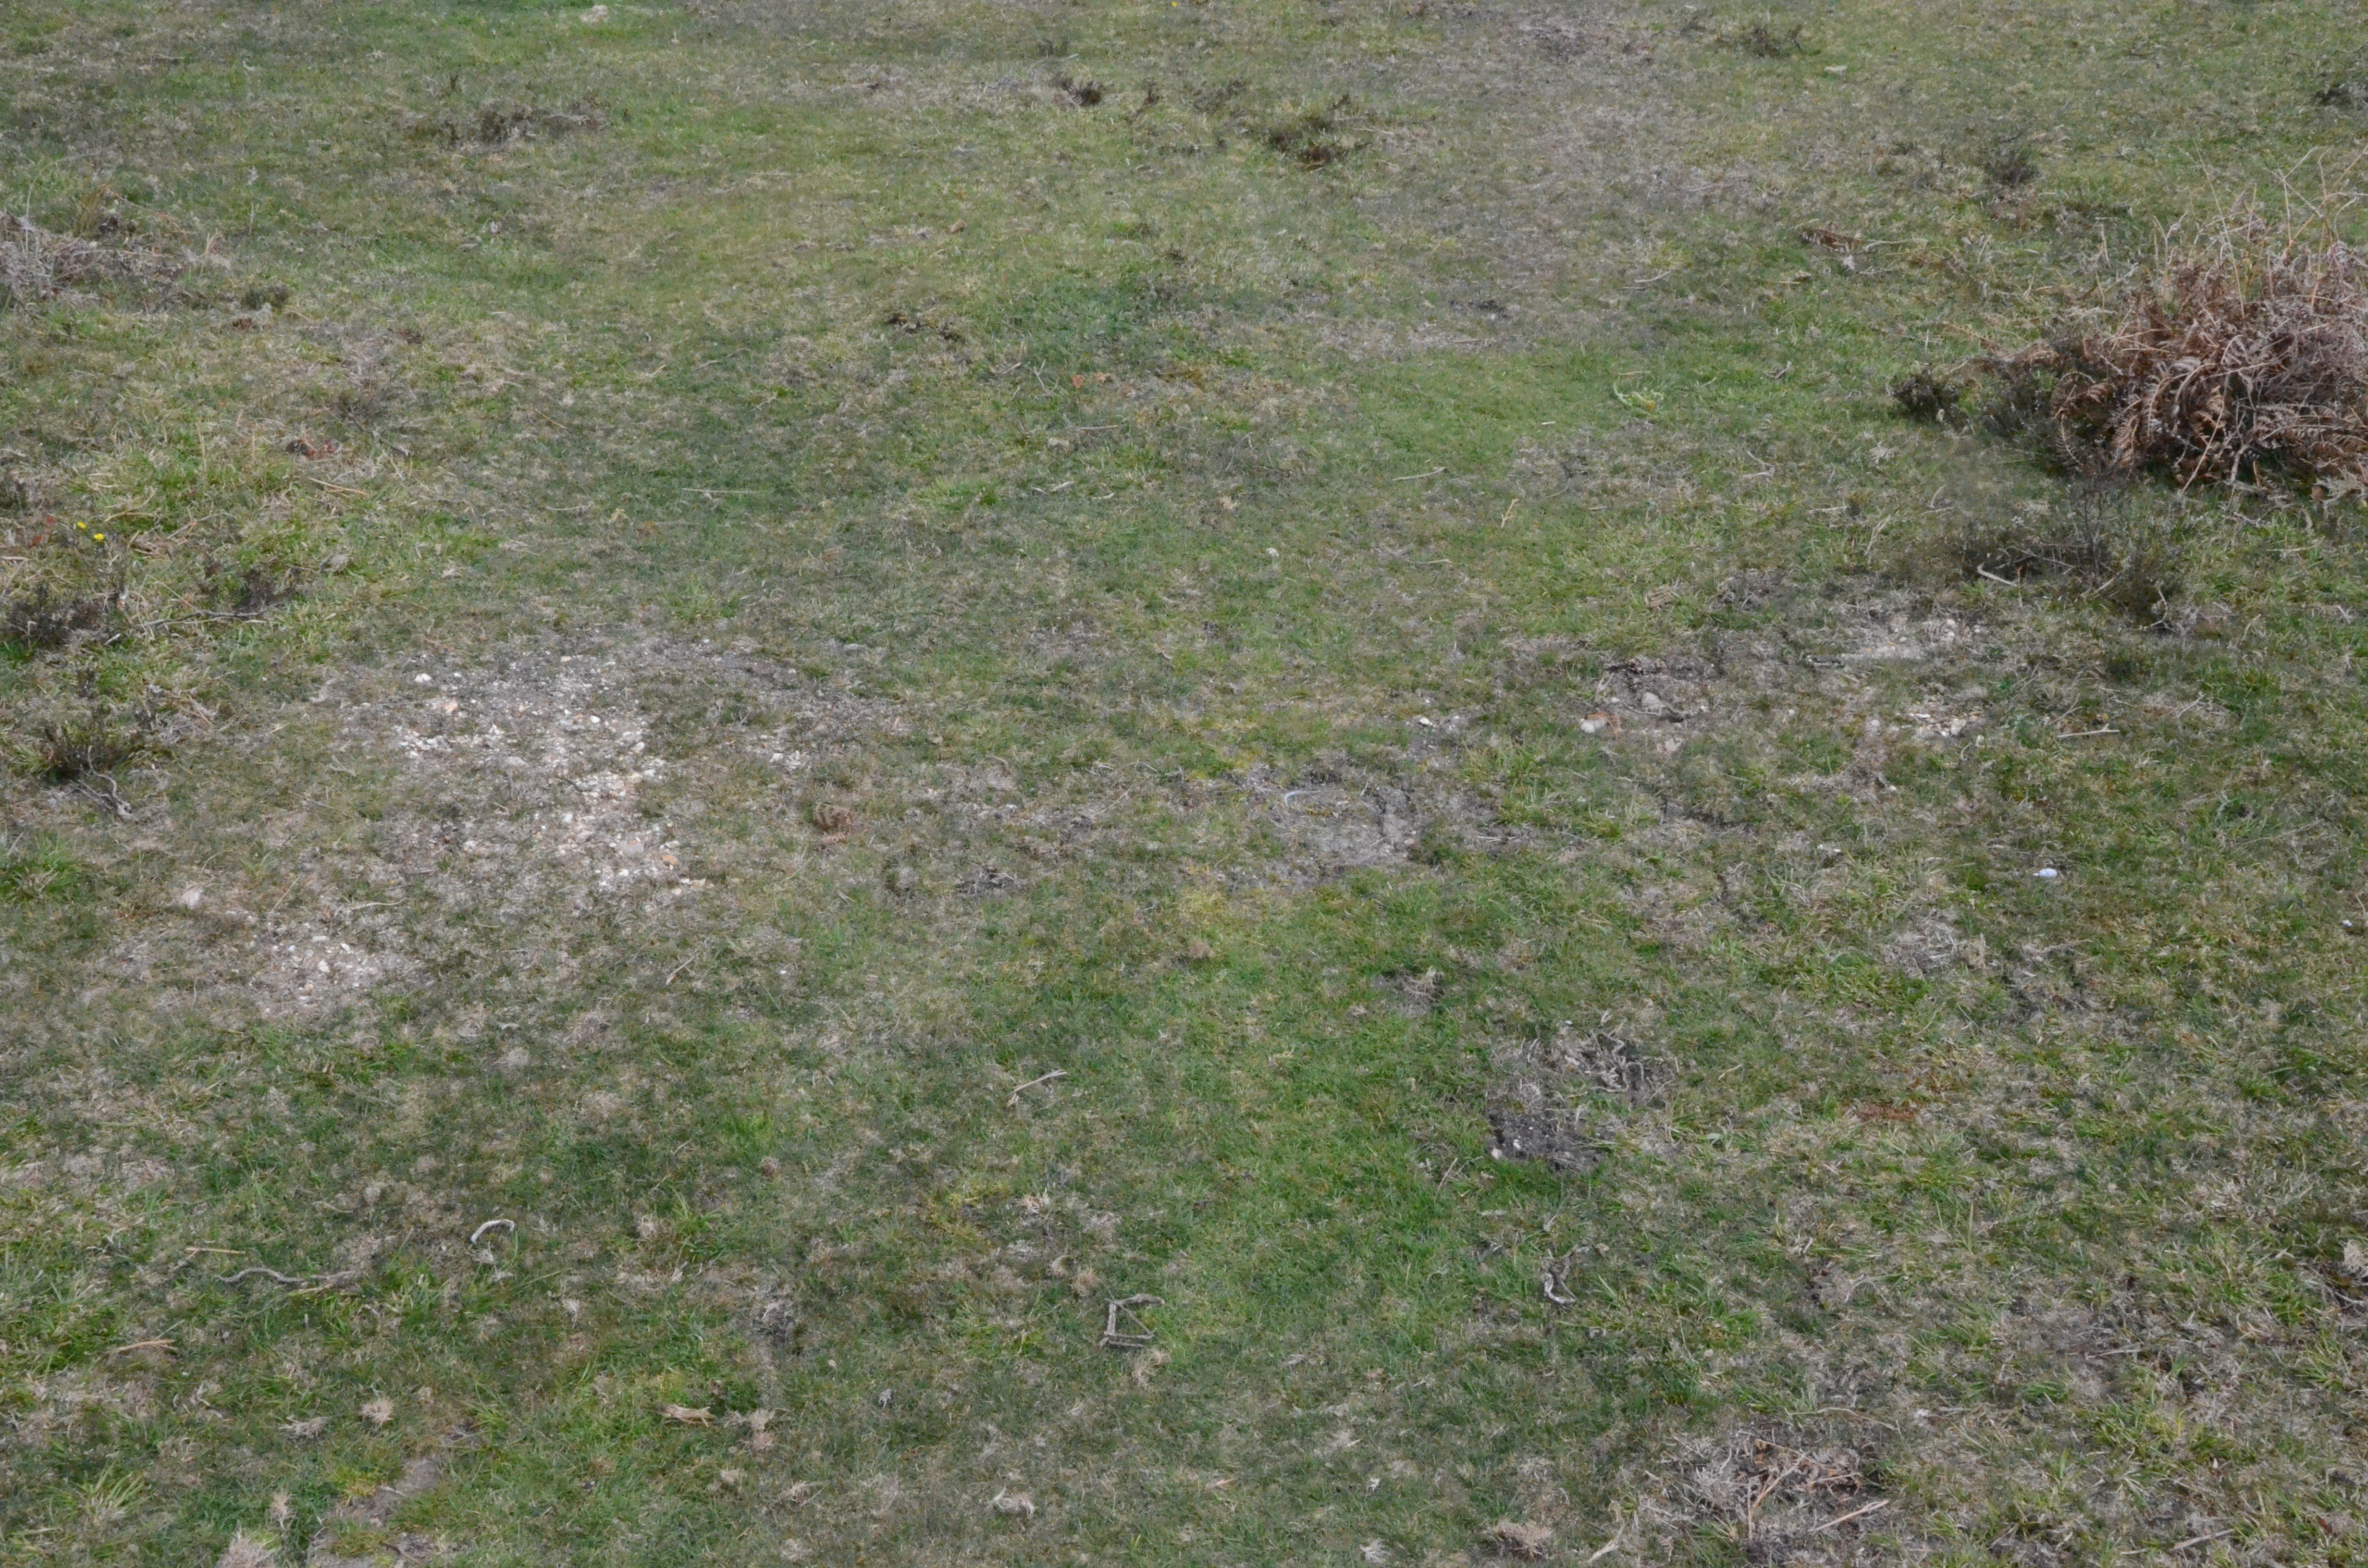
There is evidence on the ground that bombing was not a precise art at the time. The craters of near and not so near misses are all around.
Most of the range was designated for 'Inert' bombs, filled with concrete instead of explosive.
The aim of the test was to see how they penetrated the structure, which they were designed to do before exploding inside.
A smaller part of the range was used for 'live' bombs, and these have left craters in many places.
Most are now pools of water of unknown depth, while others are just shallow depressions in the ground, with a distinctive vegetation cover.
Most of the targets are located on ridges or other high points, probably to reduce the risk of the planes flying into the ground during the mostly low-level attacks.
During the investigation it became apparent (and ought to have been obvious) that the targets were linked by vehicle tracks,
which the observers would have needed to get around the sometimes quite wet areas.
Sub Pens
 The most obvious landmark is the misnamed "sub pens".
This large concrete structure was a prototype civilian air-raid shelter built by the Ministry of Home Security and tested here.
Because of security at the time nobody was told what it was,
and locals who saw it guessed it was a replica of a German submarine pen.
Those pens in fact were much more massive structures.
After the war it was covered with earth as it was too hard to demolish.
Testing didn't go too well, as it took at least 15 attempts before a bomb finally hit it.
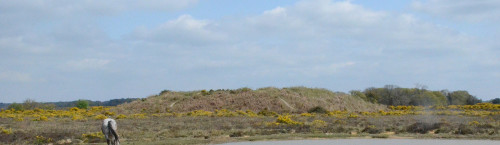
It stands on the skyline from most approaches, about 3 metres high, and is marked on the OS maps as "Tumulus".
It is located at SU140141. The grass has eroded away in places, showing the concrete beneath.
The most obvious landmark is the misnamed "sub pens".
This large concrete structure was a prototype civilian air-raid shelter built by the Ministry of Home Security and tested here.
Because of security at the time nobody was told what it was,
and locals who saw it guessed it was a replica of a German submarine pen.
Those pens in fact were much more massive structures.
After the war it was covered with earth as it was too hard to demolish.
Testing didn't go too well, as it took at least 15 attempts before a bomb finally hit it.
It stands on the skyline from most approaches, about 3 metres high, and is marked on the OS maps as "Tumulus".
It is located at SU140141. The grass has eroded away in places, showing the concrete beneath.
Tallboy Crater
 Located at SU199140. The Tallboy bomb was a 6 ton bomb designed to penetrate the ground before exploding,
and by so doing mimicking an earthquake and disrupt the foundations of structures such as bridges and shelters.
The crater from a test of one is immediately to the east of the "sub pens".
It was nicknamed "earthquake bomb".
Located at SU199140. The Tallboy bomb was a 6 ton bomb designed to penetrate the ground before exploding,
and by so doing mimicking an earthquake and disrupt the foundations of structures such as bridges and shelters.
The crater from a test of one is immediately to the east of the "sub pens".
It was nicknamed "earthquake bomb".
This crater is sometimes mistakenly described as the "grand slam" crater.
The Gramd Slam was a 10 ton version of the Tallboy, and its crater is elsewhere, filled in with earth.
It hit about 600 metres from the "sub pens", which had been the target of the drop.
More photos here
Wall Targets
Three targets in a line were built to replicate various types of building. Among other things bouncing bombs were used against them.
These were 'inert' drops, and fragments of the concrete can sometimes be found nearby.
No 1 Wall target
 Located at SU198152. A long flat area runs roughly north-south with banks around.
More photos here
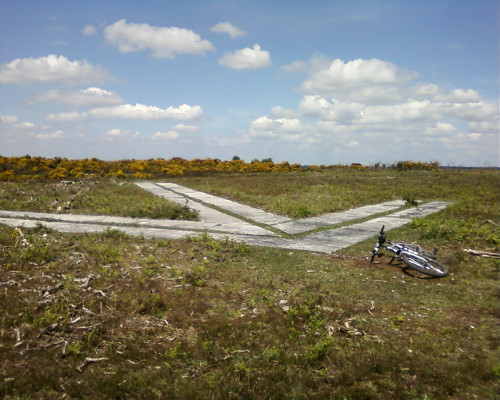
No 2 Wall Target
Located at SU205156.
This is part of a feature easily seen from the air, and is shown on the OS maps as a dotted circle, with a northerly extension.
This "bullseye" target was a large concrete circle surrounded by concentric rings.
The concrete has been removed, leaving a circle of very sticky orange clay.
The northerly extension was also concrete and is now grass. The wall was in the centre of it.
Photos available here
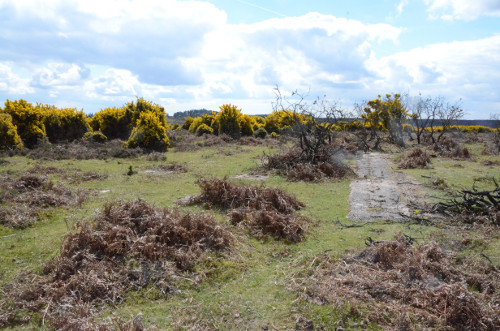
No 3 Wall Target
 Located at SU212161.
This is now a low bank covered in grass and bushes. There are concrete fragments in front (west) of it.
Located at SU212161.
This is now a low bank covered in grass and bushes. There are concrete fragments in front (west) of it.
More photos here
There are reputed to be brick-lined trenches nearby, from which the drops were filmed.
Some film of these drops exists here.
It's interesting to note the direction of rotation of the bombs.
The first film is testing weapons to use against dams, which rotate backwards,
so that once they hit the dam wall, they would be forced into contact as they sank.
The others intended for ground attack, rotate forwards, so that when they stop bouncing they continue rolling along the ground.
In some cases after impact they can be seen to continue spinning and roll up to the target again.
I could not find the trenches, as it is in the season when ground-nesting birds are at risk, so I could not search too extensively off the tracks.
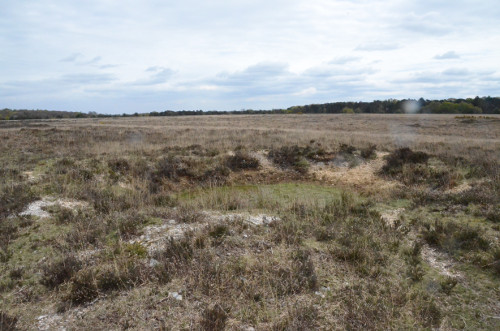
Fragmentation Target
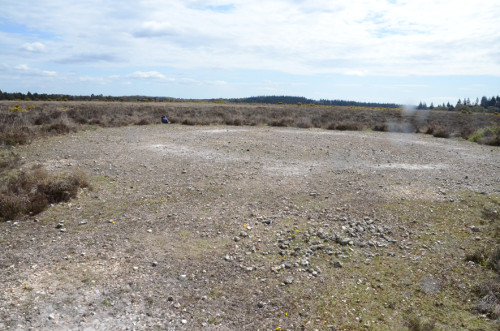 Located at SU209148. One of several targets for testing fragmentation bombs, designed to use against airfields.
The circular structure seems likely to replicate a dispersal pad.
Dispersal pads were used to spread parked aircraft around an airfield, making it difficult to damage several with one bomb.
Located at SU209148. One of several targets for testing fragmentation bombs, designed to use against airfields.
The circular structure seems likely to replicate a dispersal pad.
Dispersal pads were used to spread parked aircraft around an airfield, making it difficult to damage several with one bomb.
Illuminated Target
 Located at SU191127.
It is described as "day and night high level bombing target".
Both the target and the arrow were illuminated using a generator.
As bombing was from a high level, the location in a valley would not have presented any difficulties.
Located at SU191127.
It is described as "day and night high level bombing target".
Both the target and the arrow were illuminated using a generator.
As bombing was from a high level, the location in a valley would not have presented any difficulties.
This proved elusive.
It is the one feature on the range which is in a hollow, rather than on the skyline.
There is a large arrow pointing to it, which is located on the skyline at SU188135.
Descriptions said "near Latchmore Brook",
and photos showed it near woodland, which could of course have changed.
In the end I found it by first finding the magnetic bearing of the arrow on the hillside.
The arrow isn't visible from the valley, but there's a path round it which does show up.
By walking along the brook until the reciprocal bearing pointed to the arrow, it was possible to see the target.
Getting to it was another matter, as it's located in a large swamp.
Although the weather has been dry lately and the streams were low, the swamp was still more than knee deep in places.
The approach from the stream is likely to be the only feasible way in wetter conditions.
The remains are a number of concrete boxes in a circle at SU191127.
Despite being in a swamp, they are firmly fixed to something, although one has tipped.
Access to this during the war would have been difficult, assuming the swamp existed then.
It is not easy to see why the target would have been placed in a swamp at the time.
It seems possible however that the swamp is the result of multiple bomb impacts changing the ground structure.
More photos here
Ship Target
 Located at SU192152.
It was a wood and steel wall used to replicate the structure of merchant ships.
It was used to test the ability of bombs to penetrate the ship's side.
The foundation of the wall, and blocks to support bracing timbers behind it, are still in the ground.
Nearby are what looks like foundations of buildings next to the access road.
They seem to have been partly below ground level.
More photos here
North Tower
 Located at SU205165.
An observation tower located next to the road along the northern boundary of the range.
There was a wooden tower and an arrow.
The triangular banks probably mark the position of the arrow.
More photos here
More details and locations can be found here
This site shows more detail of the north Tower, which suggests that what I found was something else.
The dummy airfield was nearby and had a dummy control tower. I may have located that instead.
 During both World Wars the New Forest was used for military purposes. Remains of some of this still exist in 2017.

 The most obvious landmark is the misnamed "sub pens".
This large concrete structure was a prototype civilian air-raid shelter built by the Ministry of Home Security and tested here.
Because of security at the time nobody was told what it was,
and locals who saw it guessed it was a replica of a German submarine pen.
Those pens in fact were much more massive structures.
After the war it was covered with earth as it was too hard to demolish.
Testing didn't go too well, as it took at least 15 attempts before a bomb finally hit it.
It stands on the skyline from most approaches, about 3 metres high, and is marked on the OS maps as "Tumulus".
It is located at SU140141. The grass has eroded away in places, showing the concrete beneath.
The most obvious landmark is the misnamed "sub pens".
This large concrete structure was a prototype civilian air-raid shelter built by the Ministry of Home Security and tested here.
Because of security at the time nobody was told what it was,
and locals who saw it guessed it was a replica of a German submarine pen.
Those pens in fact were much more massive structures.
After the war it was covered with earth as it was too hard to demolish.
Testing didn't go too well, as it took at least 15 attempts before a bomb finally hit it.
It stands on the skyline from most approaches, about 3 metres high, and is marked on the OS maps as "Tumulus".
It is located at SU140141. The grass has eroded away in places, showing the concrete beneath.
 Located at SU209148. One of several targets for testing fragmentation bombs, designed to use against airfields.
The circular structure seems likely to replicate a dispersal pad.
Dispersal pads were used to spread parked aircraft around an airfield, making it difficult to damage several with one bomb.
Located at SU209148. One of several targets for testing fragmentation bombs, designed to use against airfields.
The circular structure seems likely to replicate a dispersal pad.
Dispersal pads were used to spread parked aircraft around an airfield, making it difficult to damage several with one bomb.